By Bryan Wall
Product Test Journalist | Kaipūrongo Whakamātautau Hautaonga
Everyone loves a nice soft-boiled egg and soldiers, right? But perfecting that egg with the white properly cooked and the yolk still runny is a fine art, and the disappointment on the children’s faces when a hard centre is revealed is every parent’s fear.
There are numerous products to help us perfect this art, aside from the humble saucepan. We have microwave-based options and stand-alone egg cookers, among other wild cards. Many of these promise an easier way to achieve perfect eggs, but how true are these claims? Here is my eggs-perience:
The stand-alone product
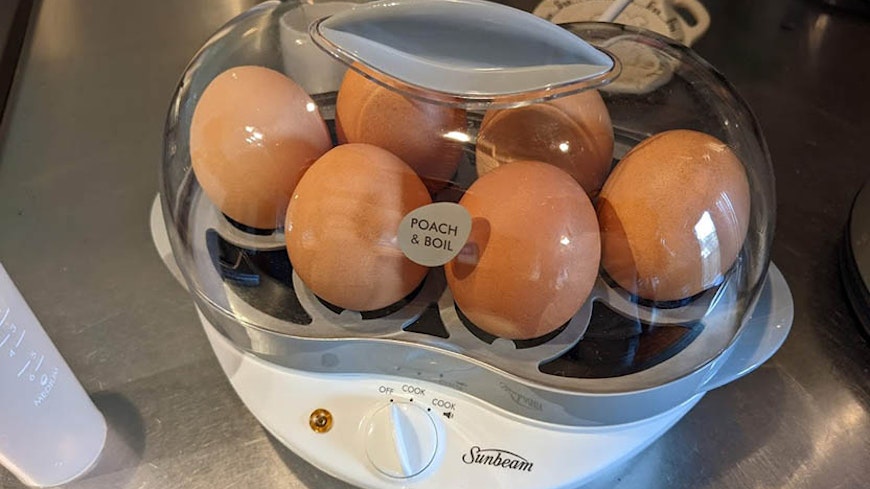
There are a few stand-alone egg cookers, including a cheap one from Kmart, but we decided to go for the Rolls-Royce model from Briscoes, The Sunbeam Poach & Boil Egg Cooker – mainly because we wanted to test out its poaching abilities, which the Kmart product does not have. We paid $59 for ours on special, down from $79, but as I write this I see it’s half price.
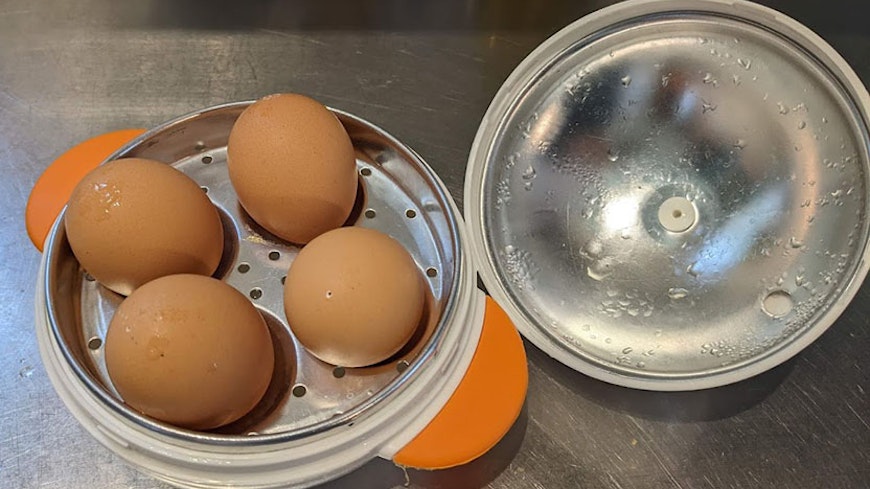
The Sunbeam can boil up to six eggs at once or poach two eggs using the supplied trays. Technically it’s not really an egg boiler, more of a steamer, as the eggs sit above a shallow bath of water. It does not use a timer; rather, it controls the cooking time by the amount of water used. The jug has measurements for the water required for the number of eggs you’re cooking, and if you want soft or hard. Once the water has boiled away, a sensor sounds a buzzer.
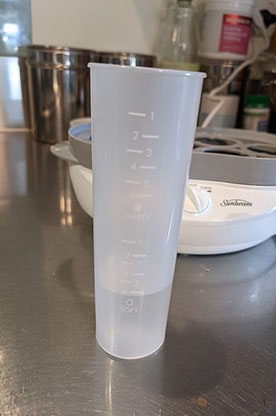
Yes, this is all the water it takes to boil six eggs!
Initially I was confused when I looked at the water measurements, because less water is needed to cook more eggs! But once the water is turned to steam, it condenses on the shells and drips back down into the boiler tray, to be recycled. So with more eggs you have more surface area, therefore more condensation dripping back down and a longer cooking time for less water. If you have fewer eggs, more of the steam escapes out of the vent hole in the top of the clear cover.
The product itself is a fairly inoffensive design, reasonably compact and friendly looking. It does feel a bit cheap; the plastic is thin and the single dial doesn’t feel all that robust. But it’s not as ugly as some of the current stand-alone kitchen appliances out there (air fryers, take note).
My first attempt at creating the perfect soft-boiled egg with the Sunbeam used three eggs. I filled the water up to the correct level on the soft-boiled scale on the jug, poured it into the boiler and sat the three eggs on the tray. Before doing this, you are supposed to pierce the eggs on the larger end with the spike that’s incorporated into the bottom of the water jug, to stop them cracking, but with later attempts I didn’t bother and didn’t have any cracks.
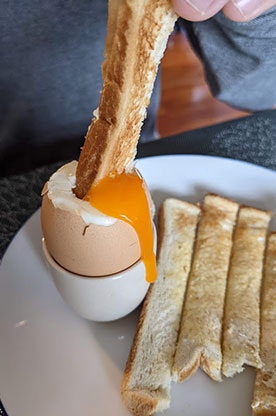
The perfect runny yolk.
Put the lid on and turn the dial. There are two settings: one for cook with buzzer and one without. I have no idea why you wouldn’t use the buzzer option, as you are likely to damage the element if you forget to turn it off and it boils dry. You also need to ensure it’s sitting on a level surface or the water may not fully cover the element, which could cause the buzzer to sound prematurely.
Fairly quickly the water boils and the clear lid is covered in condensation, and some steam escapes from the rear vent. After eight to nine minutes, the water had all gone and the buzzer sounded. And boy is it a buzzer! I was not expecting such a small object to emit such a loud noise. The three eggs came out more of a medium-boiled consistency, runny in the centre, but a fair amount of the yolk was hard. The instructions explained that water levels may need to be modified to suit the size of the eggs, so I decided that next time I would drop the water level a little.
This time I went all out with six eggs, and with slightly less than the six-egg water requirement.
The result was an improvement, with more runny yolk but still not perfect.
I gave it another go with a single egg to see if the quantity mattered. Again, slightly less water than required, and a similar result. At least this thing is consistent. My eldest son did a taste test – success, and he requested another one!
For my last cook I decided to throw caution to the wind and use the amount of water for two eggs to cook one; yep, this means less cooking time, according to the science.
Is it an egg or a PacMan ghost?
And I nailed it: the perfect runny yolk.
What about poaching in the Sunbeam? Crack an egg into each of the plastic poaching trays (which you should grease beforehand), and these trays sit on top of the boiling rack. The water jug has a poaching level and then the process is the same as for boiling.
The result was good if you can get over the strange chevron-shaped egg sitting on your toast.
Overall the Sunbeam is a decent product once you have sussed the correct water levels. Its capacity to boil six eggs is great for families, as is the ability to cook a reasonable poached egg and even make omelettes or steamed veges.
Verdict: A cracking choice for bulk boiling once you have refined the water levels, with the bonus of freaky-looking poached eggs.
Microwave option
There are a number of microwave egg cooker options out there and they all work in a similar way. I’ve decided to look at the Joie Big Boiley four-egg microwave cooker. It consists of a large plastic two-piece shell with side handles and a top handle, all with soft touch rubber coating.
It’s a characterful looking product. Inside is a metal tray on which you sit up to four eggs; it’s a specially coated metal so don’t worry about it going into the microwave. The cooking process requires you to first pierce the eggs using the supplied pin, fill the base with water up to the indicated level, replace the metal tray and place the eggs on to it, then pop on the lid and twist to lock. Into the microwave on full power for four minutes. As soon as time's up, it’s important to remove the Boiley from the microwave and take the lid off to stop the eggs cooking further, but be careful as it will still be pretty hot.
A pretty good result from the Big Boiley. All eggs had runny yolks and all four family members enjoyed their lunch. I did notice that the white was maybe not quite cooked enough but five to 10 seconds more cooking would likely sort that.
Bear in mind that cooking time will vary depending on the size of the egg and the power rating of your microwave (these eggs were size small to medium grade 6, and the microwave a 1100W). So you may need to experiment with timings.
Verdict: An eggs-press option for boiled eggs.
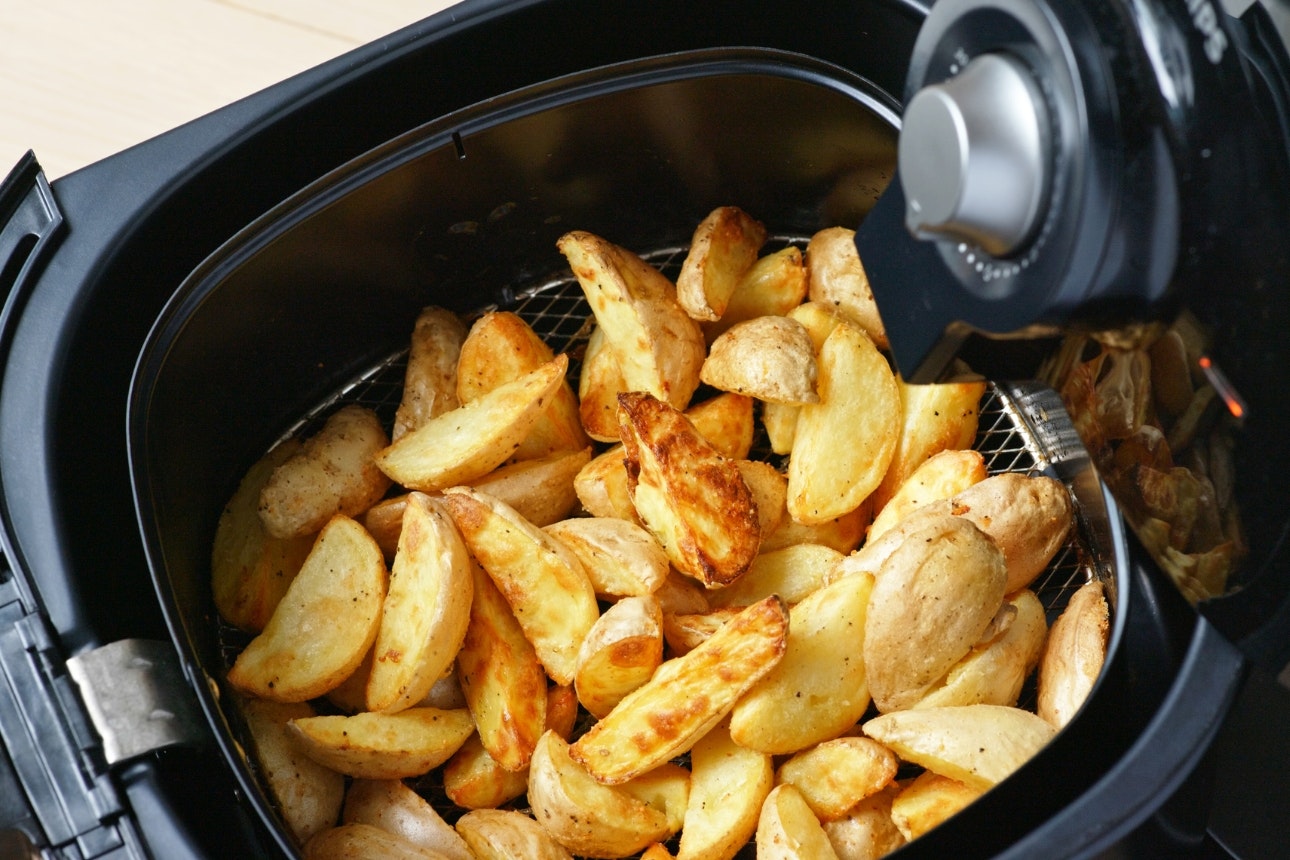
Surprise entrant – the air fryer!
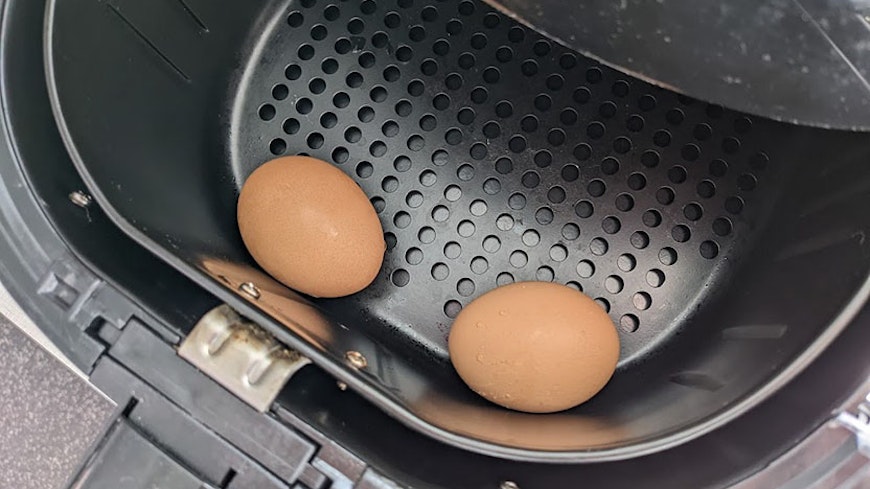
Yes, you can put all your eggs in one basket.
Yep, you heard it right: you can air-fry boiled eggs! And it's pretty easy, too. Preheat the air fryer to 120°C for five minutes and just pop the eggs into the basket and ‘fry’ them for eight minutes for soft-boiled. Straight after cooking, place them into cold water to stop them cooking further.
I was a bit unnerved when they started rattling around inside like a couple of angry hornets, but surprisingly they came out intact.
The air fryer made a pretty much perfect soft-boiled egg. Again, timing will vary depending on the size of the egg; we used reasonably large ones. Amy here at the Consumer NZ office decided she would peel and eat one but managed to ingest more shell than egg. Not recommended…
Verdict: Fry-teningly good way of cooking an egg.
DIY
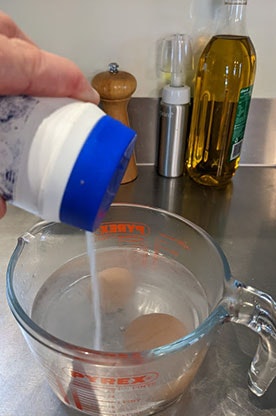
Precise measuring procedures here at Consumer NZ.
Do you really need a fancy device or air fryer to cook our humble egg? Of course you can use the old pan on a hob method, but it can be time consuming to get the water up to boil, and if you start with near-boiling water you can crack your eggs.
There is another quick and easy way though, with the microwave. The secret is to use pre-warmed, salted water – – I used 55°C water direct from my hot water tap. Fill a microwave-proof bowl or Pyrex jug with enough of this hot water to cover the eggs you are cooking, and add around half a teaspoon of salt per egg – its essential you add this salt to stop the eggs cracking or exploding, and also to be on the safe side you can prick the larger end of the egg using a drawing pin. Pop in the eggs and microwave for three minutes (this was for 2 medium sized eggs in a 1100w microwave, you may need longer for more or larger eggs, different microwave power, or lower starting water temperature).
Take them out of the water when the time is up to stop them cooking further.
This worked really well – minimal hassle, a short cooking time and an excellent result. Nice runny yolk and firm egg white. And only a jug to rinse clean as well.
After Amy’s failed soft boiled egg ingestion earlier, we decided to treat her to a proper hard-boiled egg using the above method. This time we cooked for five minutes and left in the water afterwards for a minute or two. Perfect hard-boiled eggs came out and Amy enjoyed eating them without the shells this time.
Verdict: Eggs-tremely quick, easy and ‘cheep’ way of cooking an egg.
My pick
There are many ways to cook an egg, but for me the jug in the microwave was the winner and will likely be the way it’s done in my household from now on. I’d recommend that if you already own an air fryer or microwave, don’t shell out on any of these egg cooking products.

Which air fryers perform best and offer the best value for money?
We've tested air fryers for performance and ease of use.