By Erin Bennett
Test Data Lead | Hautū Raraunga Whakamātautau
A stick vacuum is a handy, versatile way to clean your home, but as with any appliance, it will need regular maintenance to keep it in tip-top shape.
When it develops an issue that affects its ability to clean, there’s no need to head straight to the shop for a new one. Instead, dig out the manual and see if there’s anything you can do to fix it yourself.
Monthly maintenance and cleaning
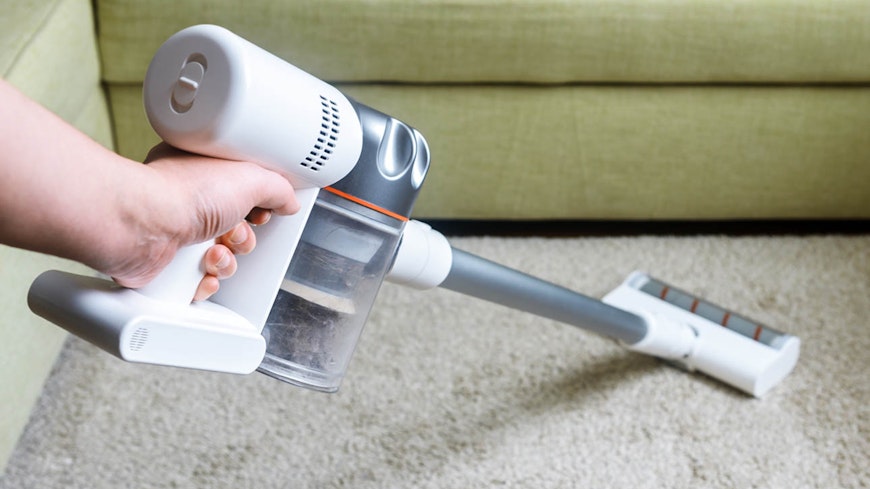
The easiest way to extend the life of your vacuum is with regular cleaning maintenance, and it can save you money in the long run:
Empty the bin/bag when full.
Clean the filters regularly (how often depends on your model).
Check for any blockages.
Wipe it down with a cloth.
Your rights when there’s a fault
If your cordless vacuum develops a fault, before you pull out the screwdriver, check the warranty. If it’s relatively new, your first port of call should be the retailer you bought it from.
Even if the warranty has expired, the Consumer Guarantees Act states that goods should be of acceptable quality and free from defects. The retailer has an obligation to remedy faults with repair, replacement or refund. If the retailer won’t help, then you can contact the manufacturer or importer/distributor.
Fixing suction issues
A vacuum isn’t really a vacuum if it can’t suck up dust and dirt. Here are a few common reasons why your vacuum may have lost suction.
Clogged cleaning head
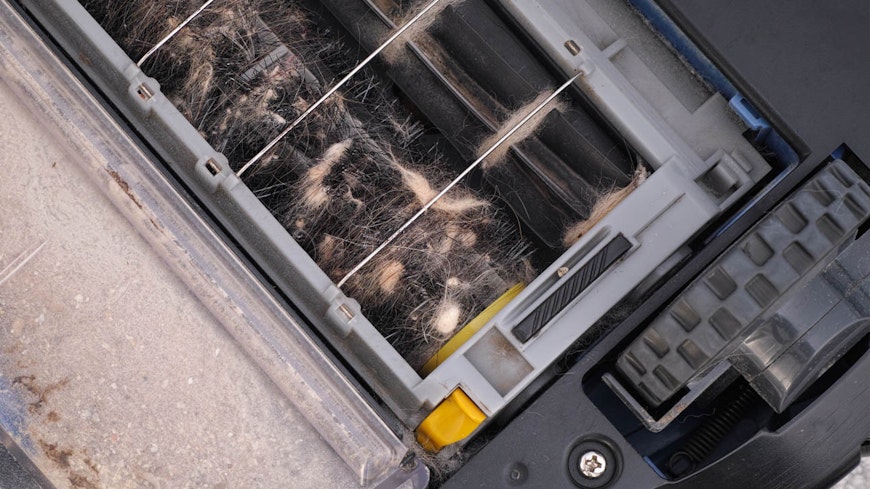
Many stick vacuums have a motorised brush head that spins. This helps it collect dust and dirt, but the brush head can easily get tangled by human hair, pet fur, thread, string and the like. Once the brush head is tangled it can become ineffective at brushing, or stop altogether. Regularly check the brush head to make sure it is turning freely.
A common way of clearing the brush head is to get a pair of scissors and cut off anything wrapped around it. Most vacuum cleaner heads have a little channel running along them which lets you slip scissors under the tangle and easily cut it away.
But we found an easier way, using a safety box cutter. This safety knife is designed to cut the tape on a box without the risk of accidentally hurting yourself. The blade is as sharp as standard box cutter, but it’s safely contained within a hooked head. You just place the hook under the box tape and pull. But we found the hook makes it great for slipping under the tangle and into that channel in the brush head, then you can easily pull to cut the tangle.
Wand/barrel obstructions
It’s very important to make sure the bin or bag is emptied when full. An overly full bin can affect your vacuum’s ability to suck, and if left for too long it can damage the motor. Make sure you’re emptying the bin or disposing of the bag when full and check the top and corners for any trapped dust.
Clogged filter
Like the bin or bag, a clogged filter can affect suction and noise, and if not cleaned it can even damage the motor. Most cordless vacuums have at least one filter, though some have two, a pre-filter and post-filter, meaning the air into and out of the motor is filtered.
Not all filter locations may be obvious, so get your manual out and check where they are. Some vacuum cleaner filters may be washable while others are disposable, so you’ll need to buy a new one.
Replacing the battery
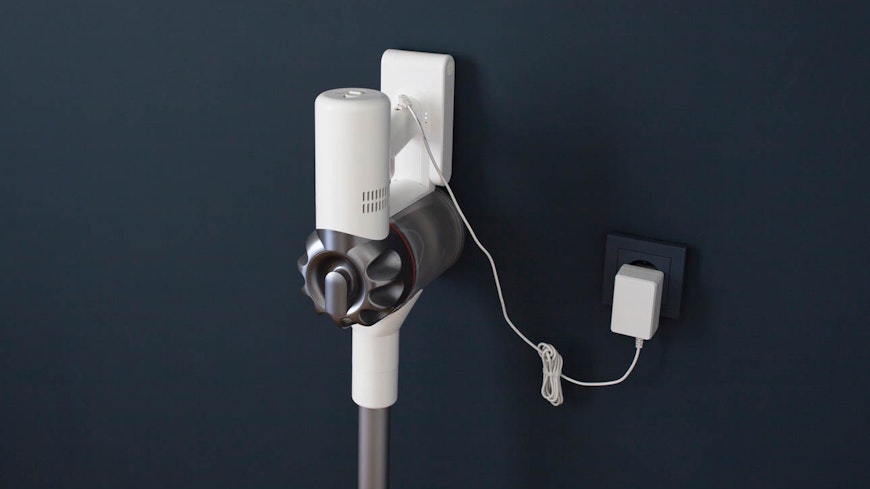
Batteries are what make stick vacuums cordless and great for manoeuvring around the house. But they are also one of the biggest limitations of cordless vacuums, shortening the lifetime as the battery can start to ‘lose charge’.
Often we get reports of stick vacuum batteries lasting only a few years before runtimes start decreasing and people end up having to charge them more. In our 2020 appliance reliability survey, battery issues (reduced runtime) was the most reported fault, at 53%.
However, in the past few years we’ve seen a good development, with some brands (such as Dyson) making the batteries swappable. This means you can easily remove the old battery and replace it with a new one, often with no tools.
It might be tempting to buy a third-party battery, but we recommend sticking with the manufacturer’s ‘genuine’ batteries as there’s no guarantee about compatibility and you could end up damaging your vacuum.
If you find your cordless vacuum battery isn’t lasting as long as it used to and you need to charge it more often, check if you can easily replace the battery. A new battery can give your stick vacuum a whole new lease on life.
Buying spare parts
Not all stick vacuum issues are easy to fix and you might need a new part. Luckily, it’s easy to find genuine parts online. Some manufacturers, such as Dyson and Miele, now sell spare parts on their own websites, while others (for example, LG) will direct you to a third-party website.
But check your manual first to see if you will be able to replace a part. Some can only be replaced by experienced repairers with the right tools. The manual might also state the part numbers you need, making choosing the correct replacement part easier.
How to make the battery last longer
The battery is an integral part of a stick vacuum, with the vast majority of models being cordless. How long a battery should last is hard to say, but we think you should get at least four years of normal use from a stick vacuum (using it twice a week) before its battery capacity falls below 65-70%. If yours doesn’t, contact the retailer and ask for a fix.
Top tips to make your battery last:
Don’t run it until it’s empty (stop before the battery is fully drained, and recharge it more often between uses).
Don’t leave it fully charged (only recharge it just before you need to use it).
Keep it at room temperature – heat makes the battery lose capacity faster.
Keep your vacuum clean and empty the bin regularly.
Run it on a lower power mode.
Only turn it on when cleaning – models with a power switch and not a trigger can use more battery if left on while you move furniture.
To test your stick vacuum’s battery capacity, run this capacity test every six to 12 months and compare results:
Fully charge the battery.
Select maximum power.
Install the main motorised cleaning head.
Start a timer.
Turn your vac on or hold the trigger until the motorised head stops spinning.
Stop the timer.
Calculate the battery capacity % = 100 x (current runtime/runtime when product new). For example 120mins/150mins = 0.8 x 100 = 80%.
What not to vacuum
Vacuum cleaners aren’t designed to clean up every mess, there are some things you shouldn’t vacuum as they can damage your machine:
Fine powders (such as plaster or flour) because these can clog filters and damage the motor.
Anything wet, unless it’s a wet/dry vacuum. Moisture in a standard dry vacuum can help breed bacteria growth or kill the motor.
Fireplace ashes, as these may still be hot and can cause a fire – not to mention clog the filter and damage the motor even when cool.
Glass shards, as this can damage many parts of the vacuum, particularly the filter and motor. And if it’s a bag model, it can puncture the bag.
Professional repair
When repairing your vacuum yourself is too much, there are people you can call, and they’re not the Ghostbusters. Check your local repair cafe to see if they can help you repair your vacuum. Find your local cafe at repaircafeaotearoa.co.nz – often they have the experience and tools to help.
When all else fails, before sending your vacuum to the tip, see if you can get a local repairer to fix it. The repair cost may be less than a new vacuum and you avoid yet more waste going into a landfill.

